Toilet installation might not be the flashiest topic at your weekend BBQ chat, but it’s one of those home projects that can save you a world of trouble if done right. I still remember my first solo renovation – I underestimated what it takes to fit a loo, and let’s just say it was a real learning curve. Whether you’re sprucing up your bathroom or fitting out a brand-new ensuite, figuring out the costs and the steps involved is crucial.
It’s not just about picking a fancy toilet suite off the shelf. You’ve got to think about plumbing hookups, water efficiency rules, and even local building codes. Get it wrong, and you could end up with leaks that give you more headaches than relief (pun intended). So let’s dive into the ins and outs of toilet installation in Macarthur, NSW – I’ll break it down step by step so you know exactly what to expect.
Types of Toilets & Design Considerations
Every bathroom tells a story, and the toilet is usually the unsung hero (or villain). In modern Aussie homes, there are a few toilet styles you’ll come across:
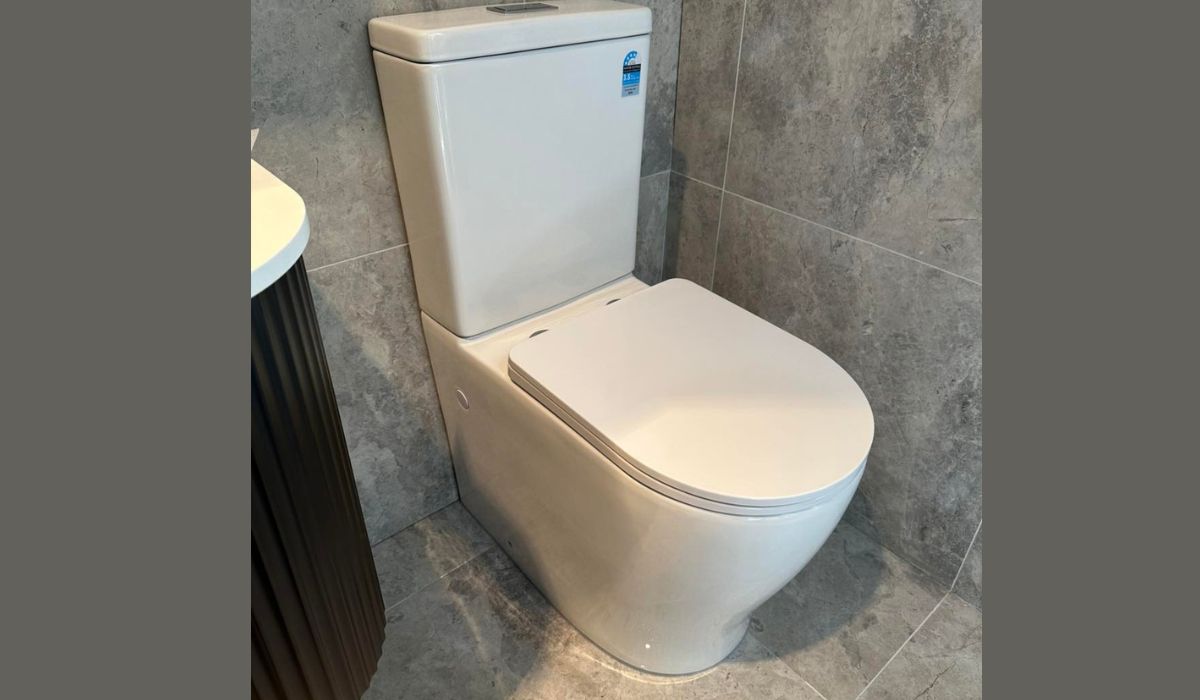
- Close-coupled Toilets: The classic two-piece design with the cistern mounted on the bowl. They’re usually the most affordable and easiest to install.
- Wall-hung Toilets: These give a sleek, space-saving look. The bowl hangs from the wall and the cistern is hidden behind it, creating a floating effect. They look stunning, but installation costs more and requires a strong supporting frame inside the wall.
- Back-to-Wall Toilets: The cistern is hidden in the wall or a cabinet, with the bowl set tight against it. You get a minimalist vibe without the bowl actually floating. Installation can be more involved than standard toilets because of the in-wall plumbing work.
Each option has a price tag and a mood. For example, ultra-modern wall-hung units can push you toward the high end (think thousands for hardware and install), while a basic white close-coupled model might set you back just a few hundred dollars for the pan and cistern.
When choosing a toilet, consider your bathroom space and style. Also think about water efficiency, because NSW takes it seriously. In fact, NSW Government rules now require dual-flush toilets with at least a 3-star WELS rating in rental homes, so you know they’re eco-friendly. Even if you’re not a landlord, opting for a 3-star (or higher) dual-flush model will save you big on water bills and earn brownie points from Mother Nature.
As I like to say, choosing a loo is a bit like picking shoes – it should match your style but also fit just right. Measure your space, check how the old plumbing lines up, and remember: moving the drainage outlet or water inlet will drive up costs (more on that soon). Trust me, giving your bathroom layout a quick double-check now can save you from a soggy mis-step later.
Installation Costs & Pricing
Alright, let’s talk dollars. Installing a toilet isn’t just a DIY quick fix – there are materials and professional labour involved. In Macarthur (much like greater Sydney), you can expect something like:
| Item | Typical Cost (AUD) |
|---|---|
| Mid-range toilet suite (pan + cistern) | $300 – $800+ |
| Plumber labour rate (per hour) | $80 – $120 |
| Labour for installation (2–4 hrs) | $160 – $450 |
| Disposal & materials (wax seals, connectors, etc.) | $50 – $100 |
| Approx. total (toilet + install) | $400 – $1,300+ |
These are ballpark ranges. A simple swap-out of an old toilet for a similar new model might clock in around $400–$600 (labour plus materials). If you fancy a high-end back-to-wall throne, or if the plumber has to reroute piping, you could be looking at well over $1,000.
For example, one recent Sydney guide noted that labour for toilet installation can run around $160–$450 on average. It’s smart to request a detailed breakdown of costs from your plumber to avoid surprises at the end.
Remember, many plumbers include the removal of the old unit in their fee, but check the quote. Some might charge extra for disposal or tough old bolts. Weekend or emergency call-out rates can bump the price too. The golden rule is to get the quote in writing – then you won’t be caught off guard on the day.
DIY vs Hiring a Professional
Now, you might be thinking, “How hard can it be to pop in a new toilet?” Well, it’s tempting to save a buck and do it yourself, but consider this: improper sealing or leaks can flood your bathroom (and your spirit) faster than you can say “Oh no, not again!” Frankly, I always recommend calling a licensed plumber.
A local Toilet Installation Expert in Macarthur has the training to handle all the tricky bits. They’ll ensure the flange is level, the wax ring fits snugly, and the water supply connects with no drips. Plus, they know NSW plumbing codes by heart. In NSW, only licensed plumbers can legally do this work – it’s not just a rule, it keeps everything safe and above board.
Hiring an expert means you also get a warranty on their workmanship. If your DIY attempt ends up needing a re-fix, you’ll likely spend more in stress (and cash) than if you’d gone pro from the start. Take it from me: the peace of mind is worth it.
Once, a mate tried to do it himself and ended up with a wobbly base – a messy late-night call to bail him out followed. Don’t be that mate. Trust me, skipping steps here could leave you well and truly flushed with regret (and water on the floor!).
Installation Steps: What to Expect
Once you’ve locked in a plumber, here’s roughly what will happen during the toilet installation:
- Shut off water & prep the site. The plumber will turn off your toilet’s water supply and flush out any leftover water. They usually protect the floor with towels or cardboard to keep things tidy.
- Remove the old toilet. This involves unbolting the bowl from the floor, disconnecting the water line, and carefully lifting the old unit away. They’ll clean the area and inspect the flange and drain pipe next.
- Install the new fixture. A new wax (or rubber) seal is placed on the flange. The new toilet bowl is set down carefully, and the bolts are tightened (but not so much that the porcelain cracks!). The tank is attached to the bowl (for two-piece models), the seat fixed on, and the water line reconnected.
- Test and finish. The plumber will turn the water back on, let the tank fill, and give it a few test flushes. They’ll check around the base, tank, and supply line for leaks. If all is dry, they’ll usually caulk around the base for a neat finish.
All up, a straightforward replacement usually takes 1–2 hours. Complications like rusted bolts, a broken flange, or moving the drain can add time (and cost). If the job is complicated, it could stretch to a half-day. Your plumber will usually give you an estimate before starting.
While they’re there, a good plumber might also show you how to maintain your new loo – like cleaning the flush jets or adjusting water levels. A little know-how goes a long way in avoiding clogs or leaks later.
Maintenance & Troubleshooting
After installation, look after your loo properly. Avoid flushing wipes, sanitary items, or any non-flushables. Use a gentle toilet brush and mild cleaner; harsh chemicals can erode seals over time. If your toilet ever “ghost flushes” or won’t stop running, usually the flapper or inlet valve needs a tune-up. A quick DIY might solve it, but persistent issues mean it’s time to call the plumber before your water bill goes up.
Water efficiency is another biggie: older toilets might use 9–12L per flush. Modern dual-flush models can use as little as 4.5L for a half-flush. Upgrading to a water-wise toilet can shave dollars off your bills and might even earn rebates in the future (keep an eye on Sydney Water’s offers). Think of keeping all parts tight and leak-free as checking the laces on your hiking boots – a little vigilance keeps everything snug.
Conclusion
Installing a toilet isn’t just a plug-and-play job – it’s a home renovation that takes planning, the right tools, and knowledge of local rules. Throughout Macarthur and beyond, plumbers handle this work day in and day out, so getting their expertise usually saves time (and headaches).
Remember the big takeaways: know your toilet type, budget for labour and materials, and always follow NSW plumbing regulations (and water-efficiency standards).
Now you’re clued up: you can budget with confidence and ask your plumber the right questions. If you feel ready to take the plunge, have a chat with a professional. They’ll confirm the costs, timeline, and give you that all-important warranty on work done.
Got toilet installation plans? Give your bathroom upgrade a flush of success by consulting with a local plumbing expert. You’ll be sitting comfortably on your new throne in no time.
Frequently Asked Questions
Q: How much does toilet installation cost?
A: On average in Australia, installing or replacing a toilet ranges roughly $400–$1,300, including a new toilet and basic labour. A simple swap-out might be near the low end (around $400–$600) if no major plumbing changes are needed. Higher-end fixtures or any reconfiguration of plumbing will push the price up. Always get quotes from a few plumbers to nail down specifics for your project.
Q: Can I install a toilet myself?
A: Technically, you can try, but it’s risky. In NSW, plumbing work should be done by a licensed plumber to meet safety and building codes. The process involves precise sealing, correct venting, and local regulations. A misaligned flange or bad seal can cause leaks and water damage. Unless you’re confident with DIY plumbing, hiring a professional is the safest bet.
Q: How long does toilet installation take?
A: For a straightforward swap, a plumber typically spends 1–2 hours removing the old unit and fitting the new one, including testing. If the job is complicated (say the old toilet’s bolted on tight or piping needs moving), it could be a half-day task. Your plumber will usually give you a time estimate upfront.
Q: What factors affect toilet installation cost?
A: Several factors change the cost: the type of toilet (basic vs. wall-hung or smart models), whether you’re just replacing an existing unit or reconfiguring the bathroom, and the going rate of local plumbers. Labour (time on site) is the biggest part of the bill, so anything that adds time – like fixing a broken flange, extra carpentry, or disposal fees – will increase the price. Always clarify with your plumber if any “hidden” work might be needed.